Add an order manually in the back office
- Last verified
- Last verified Sep 1, 2026
Use this when a customer orders by phone, email, or at the desk and you need to create the order for them instead of sending them through the online shop.
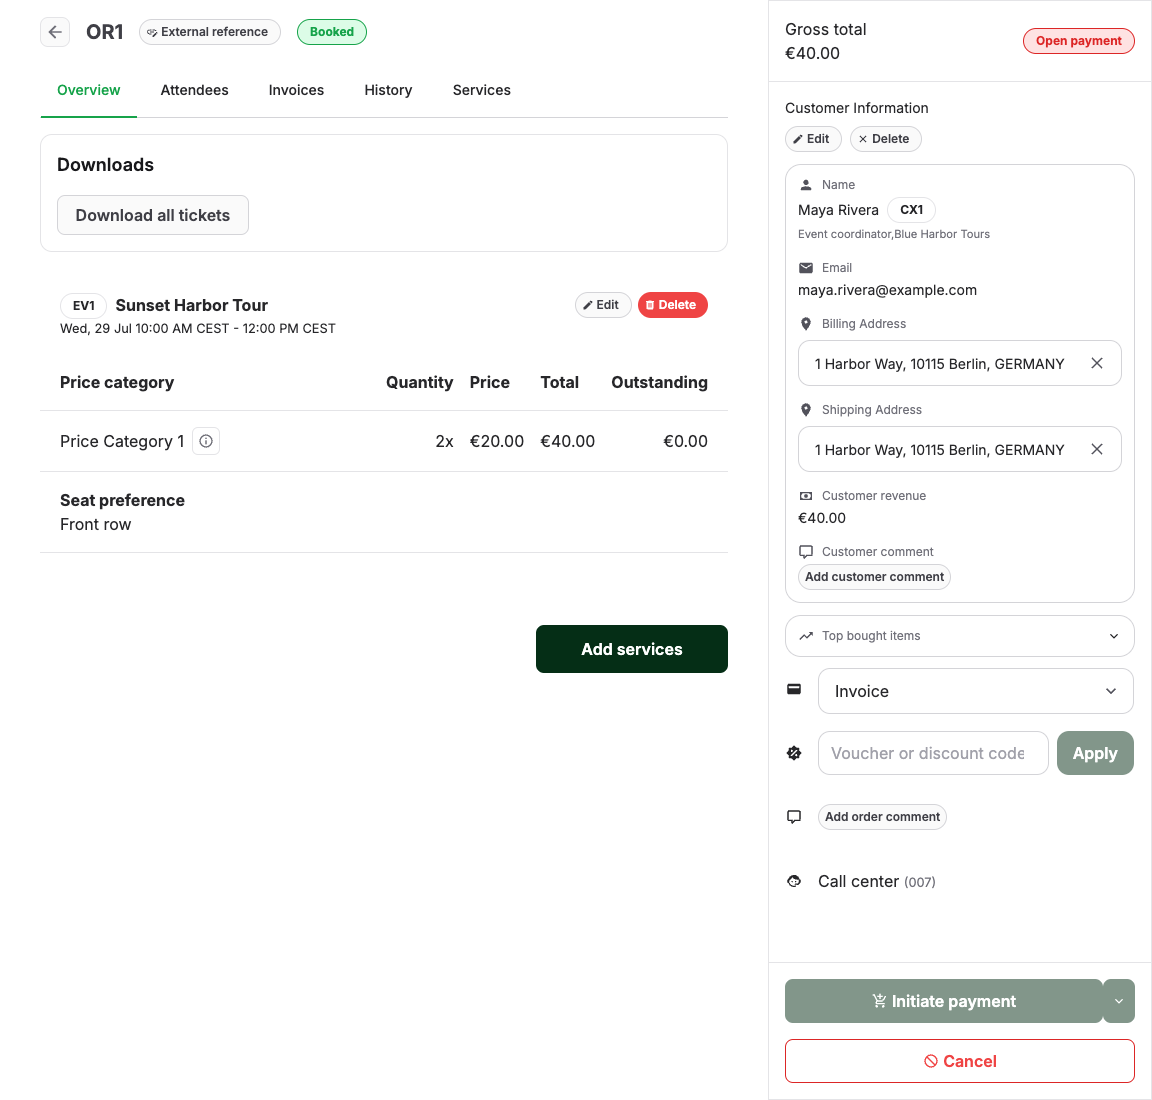
Before you start
- You need a role with permission to create orders. If Create is not available on the order list, ask an administrator to check your role.
- The services you want to sell must already exist. If a service is missing, create the event, admission, product, or voucher first.
- Have the customer's name and email ready if they should receive a confirmation or payment email.
Set the default payment method for manual orders
An administrator can set one account-wide default for new orders created in the back office:
- Open Settings > Order channels.
- Open the Back-office order channel.
- Select the Default payment method, then select Update.
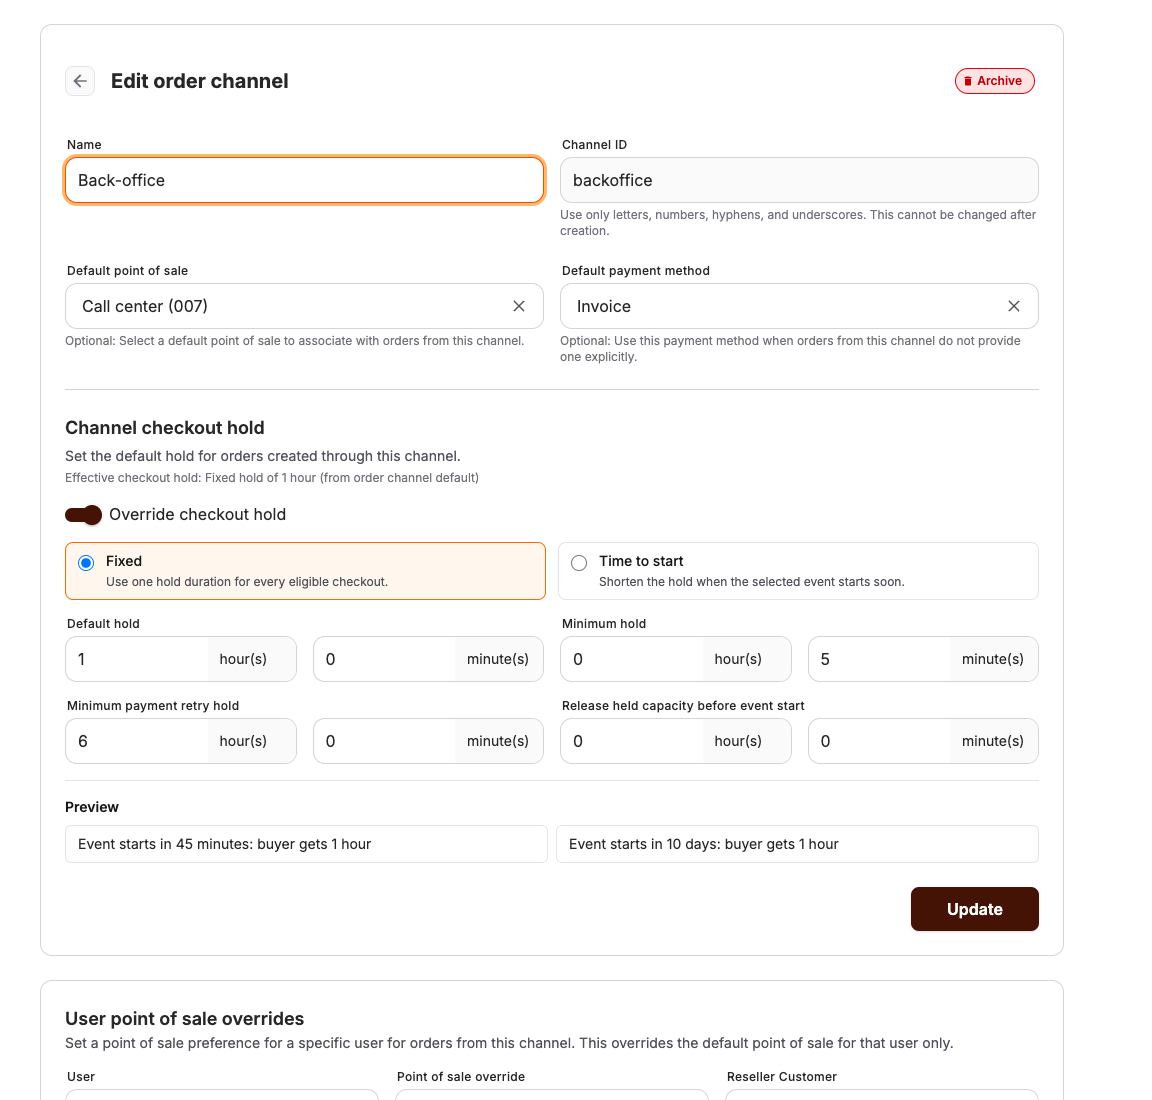
Every new manual order inherits this setting, including orders created by other staff or in another browser. Staff can still change the payment method for an individual order.
Create the order
- Open Sales > Orders and select Create. You can also open the global Search box in the sidebar and select the New order quick action.
- A new order opens on the Services tab, which lists your events, event templates, admissions, products, and vouchers.
- Select the service to add. Depending on the service, the selection walks through steps such as Date, Prices, Attendee info, Booking info, and Related products.
- Enter the quantity for each price category and complete any required attendee or booking information.
- Select Add to order. Repeat for additional services.
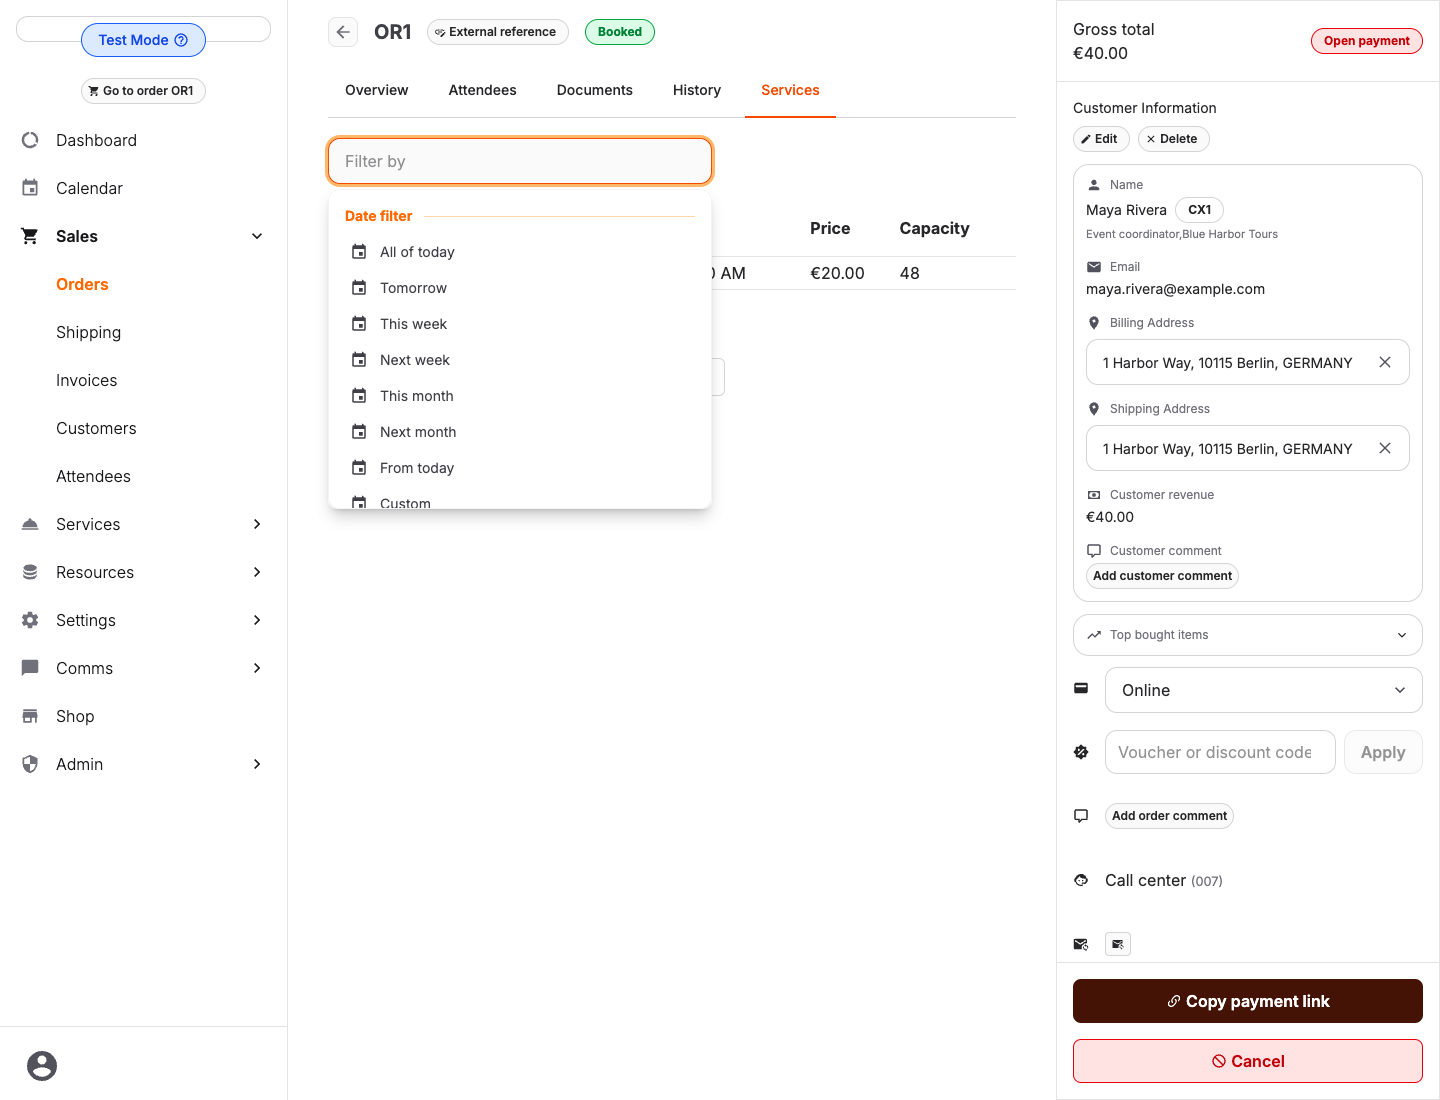
The Capacity column can show the exact remaining capacity for a fixed event or an admission without selectable start times. Timed recurring offers show Varies by start time instead. Select the offer and a start time to see the exact availability for that occurrence.
The service list starts with upcoming offers. Open the filter and select All of today to include every event today, including events that have already ended. This view does not use live availability to filter the list, so completed occurrences remain available for correction workflows. Select a custom date when you need another day; past dates are available for the previous seven days. The chosen date follows recurring offers into their time selection.
Confirm resource overbooking
A start time marked Resource capacity exceeded can be selected by staff, but saving requires a separate resource warning and confirmation. Follow your venue's overbooking policy before continuing. Unavailable resource hours, missing or archived resources, and invalid resource settings cannot be overridden this way.
Select Add to order, or save your quantity or date/time change. Read the resource warning and select Book anyway only when you intend to exceed the available resource capacity while keeping the resource requirements. Cancel to choose another time or quantity.
If the booking quantity or resource conflict changes, review and confirm the new warning. Confirmation does not create extra resources or take resources from another event. Open requirements remain on the event for staff to resolve; review resource allocation for the day and arrange the missing resources before the event. Shared-resource demand is still counted, so an overbooked resource can have no remaining capacity.
This staff exception is available in the backoffice and POS. Customers in the online shop and self-checkout cannot use it.
When the new event does not need a resource
When the booking creates a new event, staff with permission to edit resource requirements can use Resources not needed for this event in the confirmation dialog. Select only the requirements the event can run without, then select Book with optional resources.
The selected requirements become Optional on the new event. The event template and other events stay unchanged. Requirements you do not select remain required, including any that still need a resource arranged later. Optional resources can still be allocated; this choice removes their requirement for booking, rather than deleting them.
This choice is available in the backoffice. For an event that already exists, book anyway and open that event's Resource requirements to make an intentional change. A requirement belongs to the whole event, so changing it also affects other bookings on that event.
Choose the customer and payment method
- In the order sidebar, select the customer under Select customer, or create one from the same field.
- Check the Customer Information summary. You can change which of the customer's addresses is used as Billing Address and Shipping Address for this order.
- Check the inherited payment method. Change it if this individual order needs another method, for example Online / Pay-by-link or At the venue.
- If the customer has a voucher or discount code, enter it in the Voucher or discount code field and select Apply.
Delivery note is available as a new selection only when delivery-note processing is enabled and the connected KORONA account has the Faktura (INVOICING) package. Orders created by an integration can already use this method without that setup. In that case, the current value remains visible with a notice that processing is unavailable.
Create a new customer from the order
When the customer is not in the list yet:
- Type the customer's name in Select customer.
- Select Create a new customer. KORONA Event opens the create-customer form and fills First name and Last name from what you typed.
- Complete email and any other required details, then select Create.
How the typed name is split:
| What you type | First name | Last name |
|---|---|---|
John | John | _(empty)_ |
John Smith | John | Smith |
John Michael Smith | John Michael | Smith |
Hans von Müller | Hans | von Müller |
Anna Maria von Habsburg | Anna Maria | von Habsburg |
Jan van der Berg | Jan | van der Berg |
Sophie von und zu Liechtenstein | Sophie | von und zu Liechtenstein |
Smith, John | John | Smith |
von Müller, Hans | Hans | von Müller |
Middle names stay with First name. Common surname particles such as von, zu, van, and van der stay with Last name. A comma means last name first: Last, First.
If first and last name land in the wrong fields, select the swap control between First name and Last name before you save.
Finish with the right action
The buttons at the bottom of the sidebar decide what happens next. Each action opens a confirmation that states whether an email is sent.
- Initiate payment starts the path toward booking and payment. When the customer workflow is enabled, KORONA Event emails a secure link so the customer can provide required information, accept legal documents, and pay when applicable. See Ask a customer to complete and pay for an order.
- Book marks the order as booked and sends a booking confirmation without asking for payment.
- Reserve blocks the services and sends a reservation email. Reservations that pass their deadline expire automatically; see Configure reservations and unpaid order deadlines.
- Request moves the order into the requested state so availability and staffing can be checked first. No email is sent.
Request, Book, and Reserve are available in the dropdown next to Initiate payment.
In the online shop, each service's checkout policy decides whether customers request, reserve, or book. In the back office, you choose the action yourself. See the checkout policy options in Configure your online shop.
Expected result
The order has a number, the selected services, the right customer, and the state you chose. Tickets, vouchers, and invoices are generated according to the action and payment method, and appear on the order Overview under Downloads and on the Documents tab.
Recover when an order cannot be opened
If an order is unavailable, return to the order list. An administrator can check your access if you expect to be able to open it.
If KORONA Event cannot confirm that a new order was opened, check the order list before creating another order. The draft may already have been saved.
Troubleshooting
| Problem | What to check |
|---|---|
| The action buttons are grayed out | Whether the order has services with open items, whether it is canceled, and your role's permissions. |
| Reserve is not available | Whether a customer is selected on the order and whether the order state allows a reservation. |
| First and last name are swapped | On the create-customer form, select the swap control between First name and Last name, then save. |
| A validation error appears when finishing | Whether the combined services have conflicting checkout or payment settings; try separate orders for the services. |
| The service is missing from the list | Whether the service exists, is not archived, and matches the filter or search text on the Services tab. |
| An earlier time today is missing | Select Show whole day above the time slots. Confirm the time and check existing orders before adding it. |
| A past time has no availability number | This is expected for historical dates and whole-day mode. Confirm the time and check existing orders first. |
| Customer did not receive the email | The customer email address, then the order History for the sent email entry. |
