Add a waiver to checkout
- Last verified
- Last verified Jul 29, 2026
Use this when customers must accept a liability waiver or similar legal text before their booking is complete, for example for climbing, boat rentals, or guided activities.
The setup has two parts: the waiver document itself, and the requirement on the offer that makes customers sign it during booking.
Before you start
Prepare:
- the final legal text of the waiver
- translations if you sell in more than one language
- whether every attendee must sign or one signature per order is enough
You need permission to manage waivers and edit offers.
Create the waiver document
- In the back office, open Settings > Waivers.
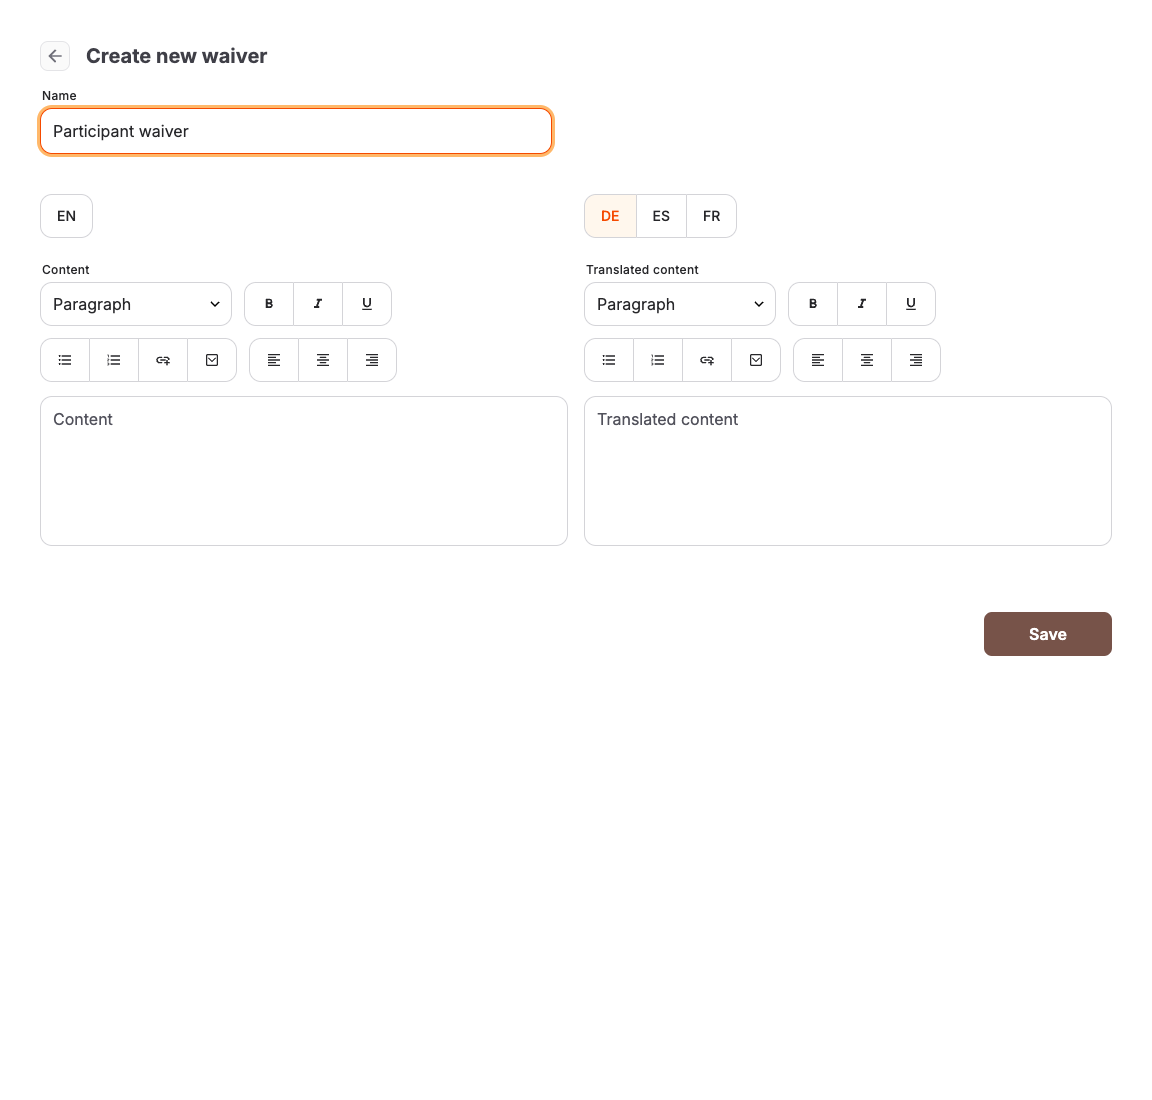
- Create a waiver. The page title is Create new waiver.
- Enter the Name and the legal Content. Add Translated content for each additional shop language.
- Save the waiver.
Require the waiver on an offer
Open the offer under Services and select the Data collection tab. What you see depends on your account's data collection setup.
If the tab shows a Waiver signature section:
- Turn on Require a waiver to be signed by all attendees.
- Select the Waiver to use. Manage waivers links back to the settings list.
- Save the tab. Each attendee must sign during booking.
At checkout, customers see one signature block per ticket, labeled with the ticket name, for example _Adult 1_ and _Child 1_. Each block asks for the signer's full name and a signature drawn in the box with a mouse or finger. A parent or guardian signing for someone under 18 selects I am signing on behalf of a participant under 18 and enters that participant's name, which appears as Minor Name on the attendee.
If your account uses form sections, add a waiver question instead:
- In the form section, add a question with the answer type Waiver.
- Select the Waiver document.
- Review the Electronic signature consent text (default: "I agree to sign this waiver electronically.") and the Consent version, which you increase when the consent wording changes.
- Choose the signature methods: Allow typed signature, Allow drawn signature, and optionally Ask for minor name when adults sign for children.
One signature per order or per attendee
- The Waiver signature section always collects one signature for each attendee.
- A waiver question follows its form section's Input scope: Per attendee collects a signature for each person, Per booking collects one signature for the whole order.
Choose per attendee whenever the waiver covers personal risk; a single order-level signature does not document acceptance by the other participants.
Where signed waivers appear
Open Sales > Attendees and select the attendee. The Waiver tab shows the signed waiver with Signee Name, Minor Name where collected, the Signature, Created At, IP Address, and User Agent. Drawn signatures are visible in the Signature field so staff can verify the recorded mark.
The attendee list can be filtered by Signed waiver and Has not signed waiver, which is the fastest way to check a group before arrival.
Waivers are signed during online shop checkout. The POS checkout does not include a waiver signing step, so for counter sales collect signatures through the online flow or on paper and keep them with the order.
Expected result
Customers cannot complete checkout without signing, and staff can open any attendee and verify the signature details before the activity starts.
Troubleshooting
| Problem | What to check |
|---|---|
| No waiver step appears at checkout | The Data collection tab of the offer, and whether the assigned form section is archived. |
| Only one person was asked to sign | The form section's Input scope; Per booking collects a single signature. |
| An attendee has no signature on file | The Waiver tab on the attendee, and the attendee filter Has not signed waiver. |
| The waiver text is outdated | The waiver Content in Settings > Waivers and the Consent version on the question. |
