Use time pattern periods for seasonal schedules
- Availability
- Beta
- Last verified
- Last verified Aug 5, 2026
A time pattern period A named group of schedule rules that can replace, add to, or subtract from base time patterns while it is active for a date range. groups start-time rules under one reusable name. Activate the period for one or more date ranges to change every assigned time pattern together.
Use periods for high and low seasons, school holidays, holiday opening hours, evening programs, or any other schedule that should be switched on as a unit from the Calendar.
How periods work
Each period has a Mode:
| Mode | Effect while the period is active | Example |
|---|---|---|
| Replace | Replaces the base schedule with the period's rules inside the selected dates. | Low season runs only at 11:00 and 14:00. |
| Add | Adds the period's rules on top of the base schedule. | High season adds 17:00 and 19:00 evening tours. |
| Subtract | Removes start times matched by the period's rules from the base schedule. | Winter removes the first morning departure. |
The period must have rules assigned to time patterns. A date range controls when it is active; the Calendar can apply or change those active ranges later.
Before you start
- Create and verify the normal base time patterns.
- Decide which patterns should change together.
- Check the existing periods assigned to those time patterns. Active date ranges for periods other than the default schedule on the same time pattern cannot overlap.
- Review Added start times in every affected time pattern and note any manual additions on the dates that should close.
- Write down the exact first and last dates of each season or exception.
- Decide whether the seasonal rules replace, add to, or subtract from the base schedule.
- Check existing bookings inside the date range before removing start times.
Find and reuse a period list
- In the back office, open Settings > Periods.
- Select Filter by.
- To find a period by name, enter all or part of the name and select Text search.
- To find periods that use a particular time pattern, open Time patterns and select the time pattern.
- Select Clear when you want to return to the full list.
Save a view when you regularly use the same text or time-pattern filter:
- Apply the list filter, then select Create new view.
- In Create View, enter a Name and select Save.
- Select the saved view above the table whenever you want to apply the filter again.
To change an existing saved view, select it, adjust the filter, then select Save > Save to this view. Use Create new view instead when you want to keep the original view.
Create a period
- In the back office, open Settings > Periods.
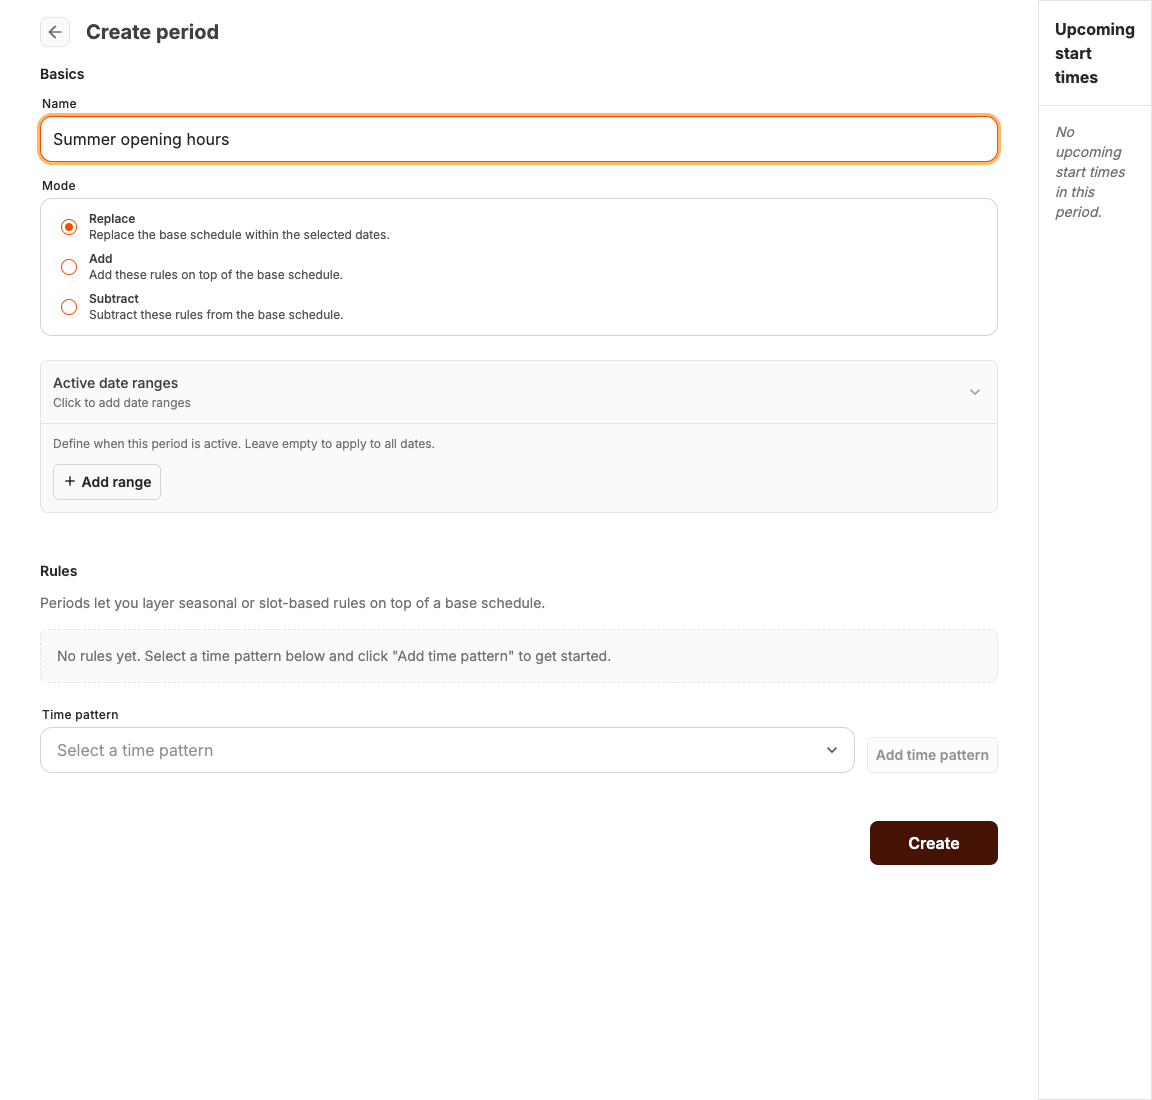
- Select Create. The page title is Create period.
- Under Basics, enter a clear Name, such as “High season”, “Low season”, or “December holidays”.
- Choose Replace, Add, or Subtract under Mode.
- Under Active date ranges, select Add range and enter the first and last active dates. Add more ranges when the same schedule applies in several separate windows.
- Save the period before adding rules when the editor asks you to do so.
Add rules for each time pattern
- Under Rules, select a pattern from Time pattern.
- Select Add time pattern.
- Add the recurrence rules that should apply to that pattern while the period is active.
- Repeat for every pattern that should change with this period.
- Save the period.
Assign every rule to a time pattern. Rules left under Unassigned time pattern must be assigned or deleted before the period is complete.
One period can coordinate several patterns. For example, “High season” can add evening starts to a tour pattern and weekend starts to an admission pattern, then both can be activated for the same summer date range.
For Replace and Add, use Upcoming start times to review the start times generated by the period rules. For Subtract, the panel can show no upcoming start times even when the rules are correct. Do not use that panel as the only confirmation of a subtract period.
Close complete dates with Subtract
To use one period for several closing days or date ranges:
- Open Settings > Time Patterns and note every base rule that generates start times for the affected offer.
- Check the existing periods for that time pattern. If another period overlaps a closing date, split or adjust its active range before adding the closing period.
- Open Settings > Periods and create or open the closing period.
- Select Subtract and add the closing dates under Active date ranges.
- Under Rules, select the time pattern and select Add time pattern.
- Add rules that generate every base start time on the closing dates. The safest method is to copy every visible setting from each base rule, including its frequency and interval, selected days, hours, minutes, and end setting. A differently expressed recurrence is also valid if it generates exactly the same dates and times.
- Return to the base time pattern and inspect Added start times. For each manual addition on a closing date, add the same date and time under Excluded start times.
- Repeat for every assigned time pattern that should close, then save.
- Check every closing date in the Calendar and the public shop.
For example, if the base pattern generates start times every day at minutes 00, 15, 30, and 45 during the hours 10 through 14, the subtract rule must cover all seven days and the same hours and minutes. A generic weekly rule at midnight will not remove those start times, even when its active date range contains the closing date.
Use excluded start times instead when only one or a few individual start times should close, or when an existing period range cannot be safely split or adjusted.
Activate or adjust a period from the Calendar
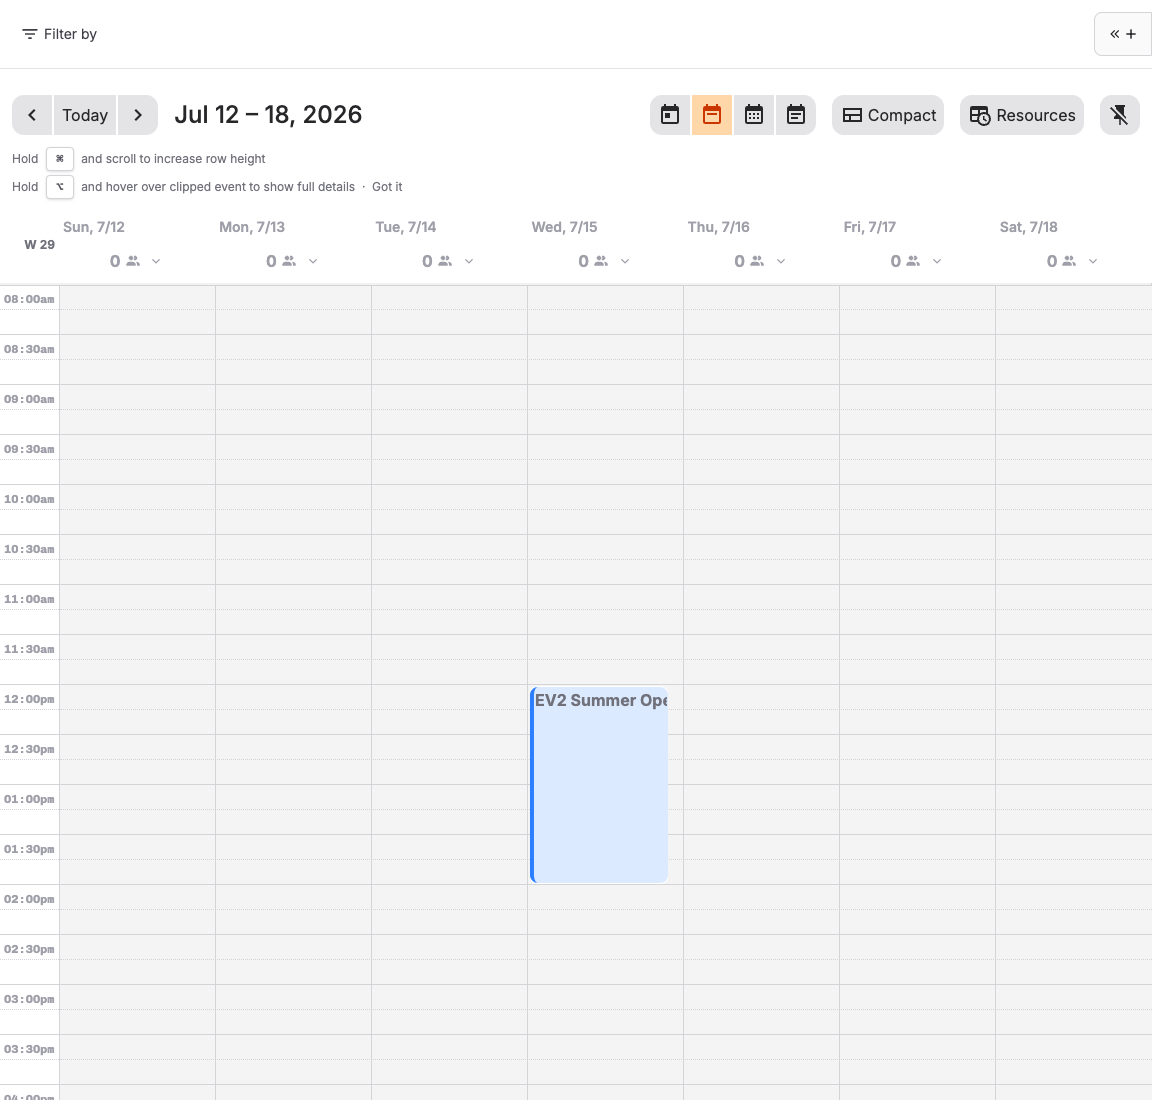
- Open Calendar and move to the first affected date.
- In the day header, find Active periods and select Edit active periods.
- Select the periods that should be active, or remove a selection to deactivate it.
- Under Apply to date range, keep the selected day or choose the first and last dates.
- Select Apply to range to save the selection. Choosing a period alone does not save it.
- Wait while the button shows Saving… and then Updating calendar…. The editor closes when the update finishes.
If saving fails, the editor keeps your selection. Correct any conflicting date ranges, then select Apply to range again. If the message says your periods were saved but the calendar could not be updated, reload the calendar to see the saved changes.
Expected result
The named period can be activated for a date range, all of its assigned time patterns change together according to the selected mode, and the Calendar and customer shop show the expected seasonal start times.
Troubleshooting
| Problem | What to check |
|---|---|
| An Add or Replace period produces no starts | Active date range, assigned time pattern, recurrence rule, period mode, and whether the range includes future dates. |
| Upcoming start times is empty | For Subtract, use the base-rule comparison, Calendar, and public shop instead of this panel as proof. |
| Base times remain during a subtract period | The date range alone removes nothing. Compare every recurrence setting and the dates and times generated in the account time zone. |
| A manually added start remains bookable | Subtract does not remove Added start times. Add the same date and time under Excluded start times in the base time pattern. |
| A period range cannot be saved | Check other periods assigned to the same time pattern. Their active date ranges cannot overlap; split or adjust the existing range first. |
| Base times still appear in low season | Use Replace when the period should supersede the base schedule, not Add. |
| More times disappear than expected | Subtract rules and every time pattern assigned to the period. |
| Only one pattern changes | Add rules for the other time patterns that the period should coordinate. |
| Shop and Calendar disagree | Offer's assigned pattern, period date boundaries, account time zone, cached page, sales period, and capacity. |
