Invite a user and choose their role
- Last verified
- Last verified Aug 11, 2026
Use this article when a new team member needs access to the back office The administrative area where staff create offers, manage orders, configure prices, assign resources, and review operational data.. You send an invitation, the invitee accepts it through an emailed link, and their user account becomes active with the role you selected.
Before you start
- You need back-office access with permission to manage users.
- Have the invitee's name and email address ready. An email address that already belongs to a user in your account cannot be invited again.
- Decide which role the person needs. Give staff the least access that still covers their daily work.
Choose the role
The invitation form offers the account's back-office roles:
| Role | Use it for |
|---|---|
| Owner | Account admins who manage settings, payment configuration, users, and roles. |
| Employee | Staff who handle daily operations such as orders, customers, attendees, and events. |
On accounts where Roles and permissions appears in the Admin group, the invitation form shows your account's own role names instead. Each role there defines permissions per area with View, Create, Edit, and Archive actions; enabling Create or Edit also enables View for that area.
Resource staff such as guides or instructors get access through the resource workflow instead of this form. See Resource user workflow.
Permissions for attendees, resources, and waivers
Use these permissions when a custom role works with attendee details or resource planning:
| Area | Action | What it allows |
|---|---|---|
| Attendees | Edit | Change attendee details, including collected personalization data and waiver signatures. |
| Required resources | Create | Add a resource requirement to an event or event template. |
| Required resources | Edit | Change an existing requirement in the current account only when it belongs to an event or event template available through the person's assigned resource access. |
| Required resources | Archive | Delete or archive a requirement in the current account only when it belongs to an event or event template available through the person's assigned resource access. |
| Allocations | Edit | Accept, reject, or cancel a resource inquiry from the back office. |
| Waivers | Create | Create a waiver. |
| Waivers | Edit | Change a waiver. |
| Waivers | Archive | Archive or restore a waiver. |
Resource staff can change attendee details and inquiries only for events and resources within their assigned resource access. A recipient can still accept or reject an inquiry from the secure link in the inquiry email; that link does not allow cancellation.
Create a custom role
Use a custom role when Owner grants too much access and Employee does not match the person's work.
- Open Admin > Roles and permissions.
- Select Create new role.
- Enter a clear Name, such as Finance viewer or Event operations.
- Choose the Role function The type of resource needed for an event, such as a guide, driver, room, or piece of equipment. that best describes the work.
- Under each Area, turn on only the required View, Create, Edit, and Archive permissions.
- Save the role, then return to Admin > Users and select it on the invitation.
Test the role with a non-admin account before assigning it broadly. A user who can create or edit in an area also needs view access there.
Steps
- In the back office, open Admin > Users.
- Select Invite.
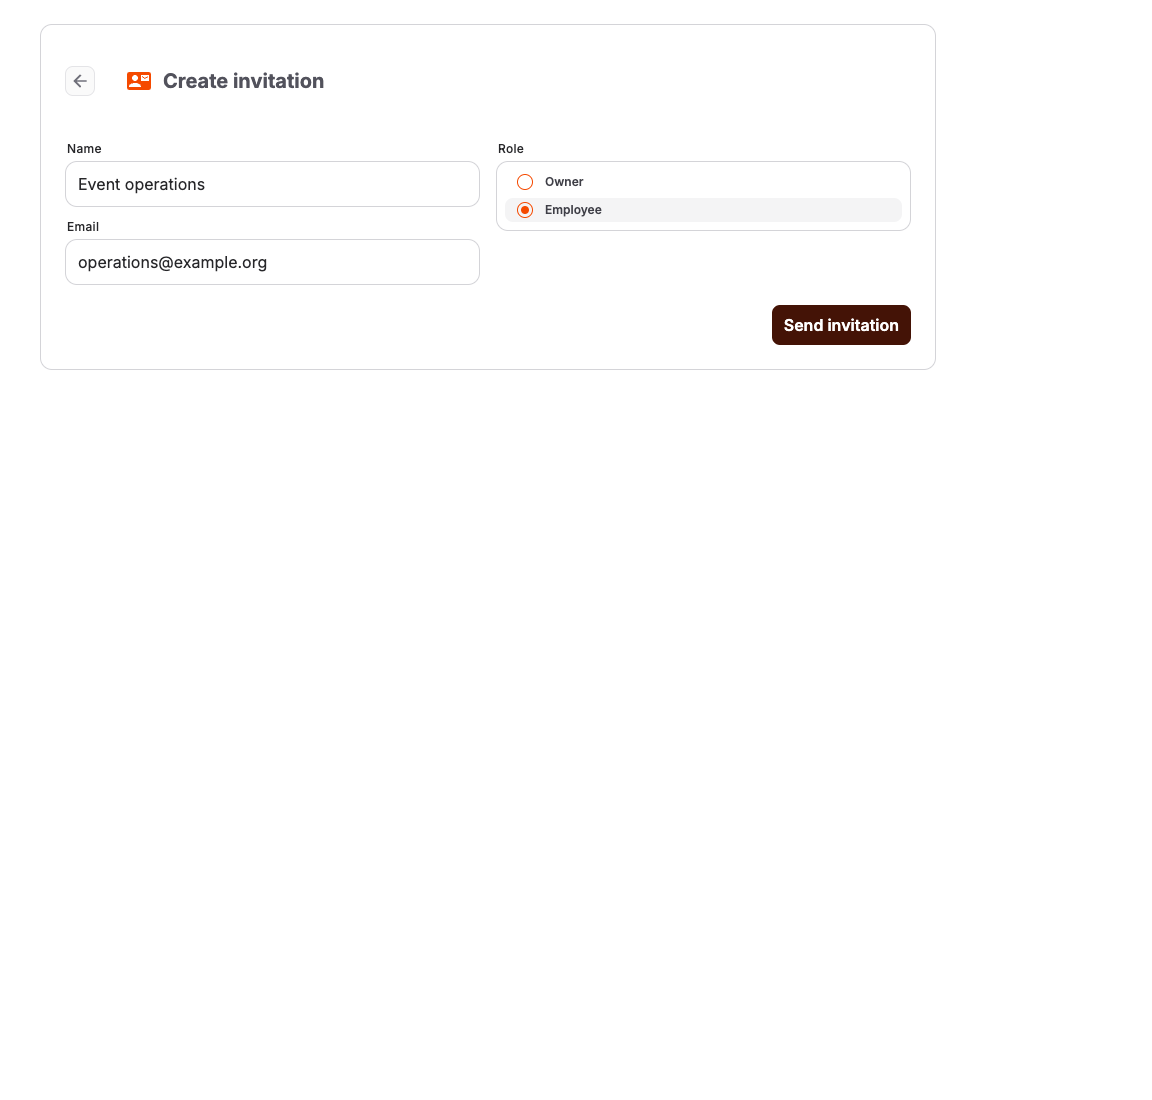
- On Create invitation, enter the invitee's Name and Email.
- Select the Role.
- Select Send invitation.
KORONA Event emails the invitation link to the invitee immediately. The invitation appears in the users list until it is accepted; once the invitee accepts it, the entry becomes a normal user.
What the invitee sees
The invitation email address is fixed on the acceptance page so access is always assigned to the person you invited. The next step depends on whether that email address already has a KORONA Event account:
| Invitee status | Acceptance step |
|---|---|
| No KORONA Event account exists for the email address | The invitee enters their name, creates and confirms a new password, then selects Create account and accept invitation. |
| A KORONA Event account already exists for the email address | The invitee enters the current password for that account, then selects Sign in and accept invitation. The existing password and profile are not changed. |
If the existing account uses two-factor authentication, KORONA Event asks for the authentication code after verifying the password.
An invitee who cannot remember the existing password can select Forgot password?. The password-reset email preserves the invitation; after setting a new password, the invitee returns to the invitation and joins your account automatically. If the invitation expires or an administrator deletes it before the reset is completed, the new password is still saved and KORONA Event tells the invitee to request a new invitation.
If another account is already signed in, the page identifies both email addresses and offers Sign out and continue. This prevents the invitation from being accepted by the wrong account.
Resend or replace an invitation
- Open Admin > Users and select the pending invitation from the list.
- Check the status: Invitation pending or Invitation expired.
- For a pending invitation, select Resend invitation link to email the link again. You can also copy the Invitation link shown on this page and share it directly with the invitee.
- For an expired invitation, select Delete, then send a new invitation from Invite.
Change a role later
Open the user from Admin > Users. Use the role control next to the user's current role to select a different role. The same page also offers Trigger password reset if the user is locked out, and Delete to remove the user from your account.
Archive a custom role
Archive a role when staff should no longer select it for new user access. The Owner role cannot be archived.
- Open Admin > Roles and permissions.
- Open the actions menu and select Bulk edit.
- Select the role or roles you want to archive.
- Select Archive in the bulk-edit bar.
- Confirm with Archive.
The archived roles disappear from the active roles list.
Expected result
The invitee receives an invitation email, accepts the link, and appears in Admin > Users as an active user with the selected role. Until then, the users list shows the pending invitation.
Troubleshooting
| Problem | What to check |
|---|---|
| The invitee did not receive the email | The email address on the invitation, the invitee's spam folder; resend the link or copy the Invitation link. |
| The invitation cannot be created | Whether a user with that email already exists in your account. |
| The link no longer works | The Invitation expires on date; delete the expired invitation and create a new one. |
| An existing user's password is rejected | Confirm they entered their current KORONA Event password, not a new password. Use Forgot password? if needed. |
| The new user cannot see a page they need | The user's role; on accounts with Roles and permissions, review the role's permissions per area. |
