Create a repeatable event with time slots
- Last verified
- Last verified Aug 3, 2026
Use an event template or admission when customers choose from repeated dates or time slots instead of one fixed event date.
This setup is common for tours, museum entry, rentals, workshops, and recurring activities. The shared setup lives on the template or admission; individual availability comes from the time pattern and generated or available time slots.
Before you start
Prepare:
- customer-facing name and description
- duration of the visit or activity
- days and times that should be bookable
- capacity per slot
- price categories and sales channels
- whether customers choose Date/time first or Quantity first
- resources needed for each slot, such as guides, rooms, or equipment
Choose the right setup
| Setup | Use it when |
|---|---|
| Event template | The same event repeats and each occurrence should behave like an event with date, time, prices, resources, and attendees. |
| Admission | Customers buy general admission without a separately managed event; an optional time pattern can provide simple timed-entry slots. |
| Fixed-date event | The offer happens once at one date and time. |
For a fixed-date event, use Create a sellable event instead.
Create the template or admission
For an event template, use the detailed Create an event template guide. The shared steps below also apply to admissions.
- In the back office, open Services.
- Choose Event templates or Admissions.
- Select Create.
- Enter the customer-facing Name and Description.
- Set the Duration.
- Set the capacity limit for each slot or occurrence.
- Turn on Hide from shop while the setup is still being prepared. Turn it off before testing the offer in the public shop.
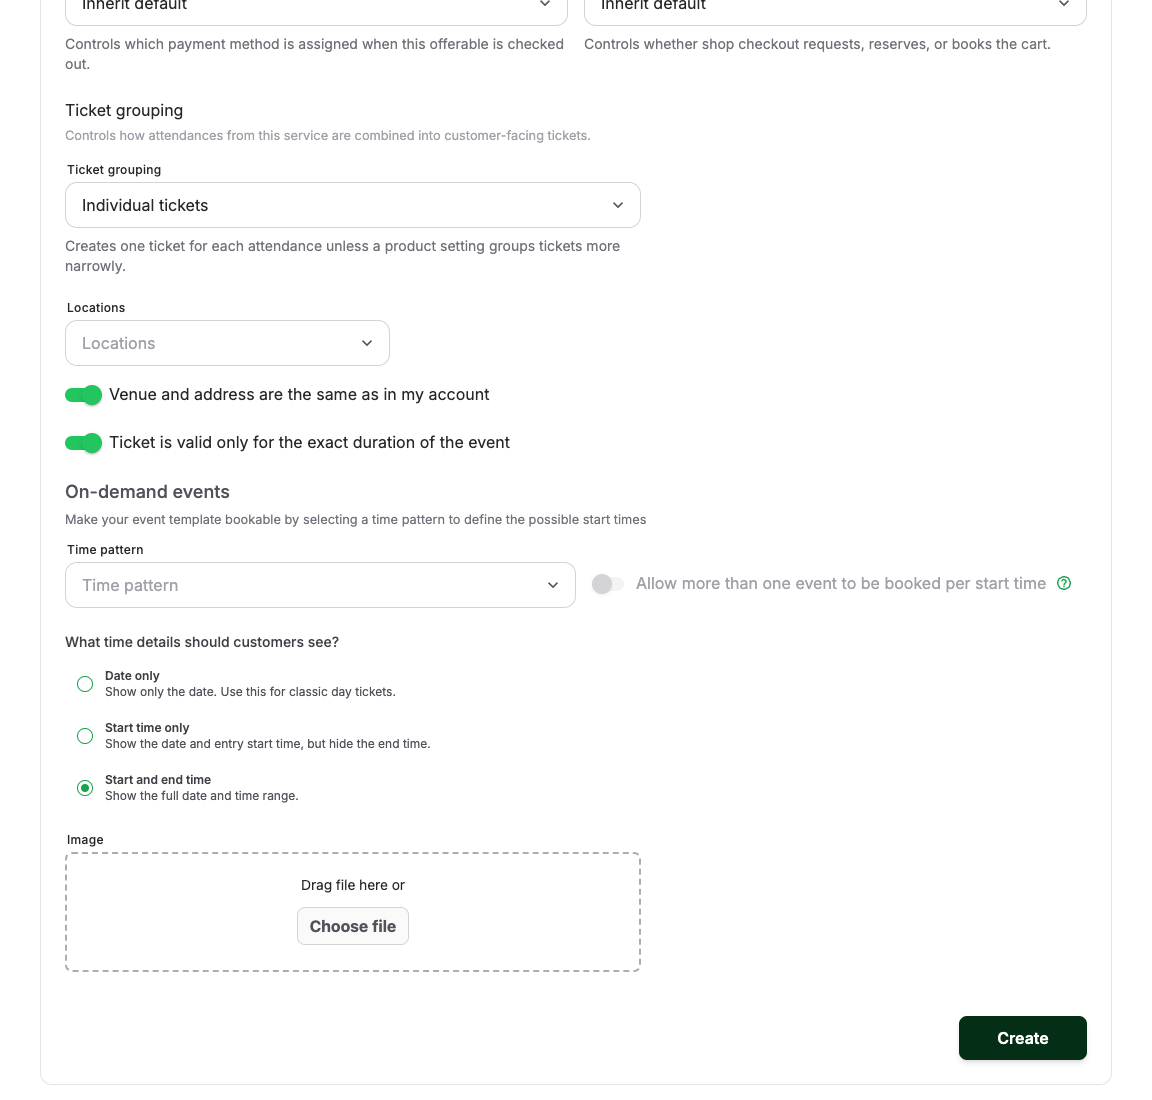
- Add tags, location, ticket grouping, and customer time display settings if they apply.
- Configure Time pattern for the days and times customers can book. Follow Create a time pattern for recurrence rules and one-off overrides.
Review the canonical ticket grouping options before choosing a grouping mode.
Use time pattern periods when high season, low season, holidays, or another date range needs a grouped schedule that can be activated from the Calendar.
Add prices and sales channels
After saving the template or admission:
- Open Prices.
- Add the price categories customers or staff need, such as adult, child, reduced, member, or group.
- Confirm the synchronized product price, quantity limits, capacity and attendee behavior, and customer-facing labels.
- Keep the default all-POS rule with no channel-specific limit unless you need a POS restriction, reserved allocation, or sales window.
- If you need an exception, open Sales channels and edit or split the rule.
Add resources when capacity depends on staff or equipment
Open Required resources when a slot needs guides, rooms, vehicles, equipment, or staff.
For each requirement, check:
- Role / Function
- quantity needed
- whether resources are selected automatically or manually
- whether missing resources should reduce availability
- whether an inquiry process is needed
Test the customer path
- Open the public online shop.
- Find the offer.
- Follow the configured booking flow:
- For Date/time first, select the date and start time, then select the ticket quantities.
- For Quantity first, select the price categories and quantities, then select the date and start time.
- In the monthly calendar, confirm that every displayed price starts with from. This is the lowest available price for that day; the exact price can depend on the selected start time.
- Before selecting a start time in the Quantity first flow, confirm that each time slot shows either the total for the selected ticket mix or the localized, accessible unavailable-price indication when a matching price cannot be determined. This is especially important when prices depend on the date, time, or remaining capacity.
- Add the tickets to the cart.
- Confirm that the cart shows the same start time, ticket quantities, and total as the selected time slot. For capacity-dependent pricing, repeat this check with slots on both sides of a pricing threshold, comparing each slot's cart total with the total shown for that same slot.
- Complete checkout with a test customer.
- Open the order and attendee list in the back office.
- Confirm the selected date, time, price, quantity, ticket, and payment or confirmation state.
Expected result
Customers can choose only the intended dates and times, see the correct prices and capacity, complete checkout, and create orders and attendees for the selected slot.
Troubleshooting
| Problem | What to check |
|---|---|
| No dates or times appear | Time pattern, publishing, sales period, hidden state, capacity, and resource availability. |
| A time slot is sold out too early | Capacity per slot, resource requirements, existing bookings, external system sync, and quantity limits. |
| Price is missing | Price category state, sales channel visibility, date-specific price rules, and whether the customer selected a supported quantity. |
| Time-slot price differs from the cart | Check time- and capacity-based pricing rules for the selected price categories, quantities, date, and start time. If those settings are correct, contact support. |
| POS cannot sell the slot | POS sales channel, POS coupling, event POS number, price visibility, and whether the slot is still available. |
| Existing slots did not change | Check whether the date was created before the template change and whether the field is inherited or copied. |
